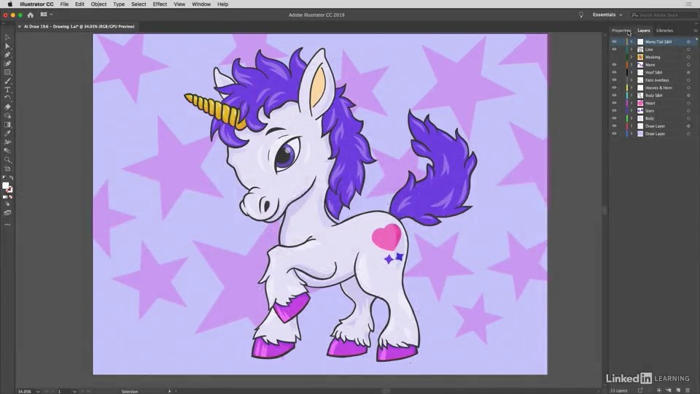
در این فیلم، من بین تفاوت های مطلق و نسبی را به شما نشان می دهم. بنابراین، برای شروع در اینجا، من به جلو بروید و در داخل این ستاره کلیک کنید تا آن را با ابزار فلش سفید من انتخاب کنید. و سپس، بر روی هر یک از این ویدجت های گرد روی دو برابر کلیک کنید تا کادر محاوره زاویه را نشان دهد. و توجه داشته باشید، علاوه بر این گزینه های مختلف گوشه ای، از جمله گرد و دور معکوس، و چمبر، ما نیز این دو آیکون گرد کردن در اینجا وجود دارد. اکنون آنها هیچ تاثیری بر روی چمبر ندارند، بنابراین من به جلو بروید و به دوران معکوس تبدیل شوید که قبل از آن درخواست کرده بودم و اکنون به طور پیش فرض متوجه میشوم که دوربینی کاملا مطلق است. معنی این است که ما در هر و هر یک از این رکوردها یکسان می گیریم. و اساسا آنچه Illustrator در حال انجام است، رسم یک دایره ای کامل در هر یک از این مکان ها است. اما، اگر من به نسبی تغییر دهم، در مورد این ستاره، می خواهم برخی از این گوشه ها را به صورت شفاف تر ببینم، همانطور که در اینجا می بینیم. بنابراین گوشه پایین پایین، آنها باقی می ماند یا کمتر سه ماهه بیضی، اما همانطور که ما حرکت به سمت بالا که اساسا گوشه های حاد تر، ما می بینیم تکه های سخت تر. بنابراین یک بار دیگر، این همان چیزی است که ما با گرد شدن مطلق می بینیم. و این همان چیزی است که ما با تقسیم نسبی می بینیم. در حال حاضر، در مورد من، ما می بینیم تکه های واضح تر، همانطور که در مورد ظاهر آیکون. اما این هماهنگی نیست که همیشه انجام شود. به شما حس می کنم که واقعا چه اتفاقی می افتد، من به جلو بروید و بر روی OK کلیک کنید تا این تغییر را بپذیرید، و اکنون قصد دارم راهنماهای من را دوباره در برگردانم : 30 بنابراین من می توانم راهنماهای مرکز را ببینم، و من قصد دارم یک نوع بیضی سفارشی ایجاد کنم 00:01:35 با استفاده از ابزار مستطیل. 00:01:37 بنابراین من با انتخاب ابزار مستطیل 00:01:40 از منوی کشویی شکل ابزار شروع می کنم. 00:01:42 و سپس من مکان نما خود را قرار می دهم در تقاطع دو دستورالعمل. 00:01:46 و سپس من alt + و یا انتخاب + کلیک 00:01:48 برای بالا بردن جعبه محاوره مستطیل. 00:01:50 و من به دنبال مربع است که 00:01:52 عرض و ارتفاع مقادیر 100 امتیاز هر کدام. 00:01:55 در آن نقطه، من به جلو بروید و روی OK کلیک کنید 00:01:57 برای ایجاد آن مستطیل مثل این. 00:02:00 خوب، الان من میخواهم آن را چرخانده باشم 00:02:01 بنابراین بیشتر از یک الماس است. 00:02:03 پس من روی کلمه Transform کلیک می کنم 00:02:05 اینجا در کنترل پنل. 00:02:06 من نقطه مرجع مرکز را انتخاب می کنم. 00:02:09 و من به پیش می روم و تغییر می کنم 00:02:10 که مقدار را به 45 درجه چرخانده است. 00:02:13 و من کلید Tab را برای چرخاندن این مربع فشار می دهم. 00:02:16 خوب، حالا من می خواهم آن را گسترده تر کنم. 00:02:18 بنابراین من قصد دارم آیکون پیوند را خاموش کنم. 00:02:21 شما می خواهید مطمئن شوید که یک زنجیره شکسته دارید. 00:02:23 و سپس روی W کلیک کنید تا ارزش عرض را انتخاب کنید 00:02:26 و آن را به 300 نقطه تغییر دهید 00:02:28 به منظور تولید این اثر اینجا. 00:02:30 خوب، در حال حاضر من به جلو بروید و کلید Enter را فشار دهید، 00:02:32 یا کلید بازگشت روی مک، برای قبول این تغییر. 00:02:34 و اگر شما هم با من کار می کنید، 00:02:36 خواهید دید شکل Expanded ظاهر شد فقط یک لحظه 00:02:39 در اینجا در بالای صفحه نمایش. 00:02:41 و این دلیل است که شما دیگر 00:02:43 مستطیل به اصطلاح هوشمند. 00:02:44 این واقعا مهم نیست چون ما هنوز 00:02:46 همه این گوشه ها برای کار با. 00:02:48 اکنون قصد داریم کلید A را فشار دهیم 00:02:50 برای تغییر ابزار فلش سفید، همانطور که در اینجا می بینیم.
00:02:53 And I'm going to turn off a couple of points here
00:02:55 by shift+clicking on the top and bottom points
00:02:59 so that only the left and right points are selected.
00:03:02 And now I'm going to change my corners value
00:03:04 up here in the Control panel to 24 points
00:03:06 because I want some pretty exacting results here.
00:03:09 And then I'll press the Enter key,
00:03:10 or the Return key on a Mac to accept that change.
00:03:12 So now we have what amounts to
00:03:14 an acute corner over here on the left and right sides.
00:03:18 And yet, Illustrator is still tracing them
00:03:20 with perfect quarter circles.
00:03:22 Now I'll click on a top point to select it,
00:03:25 and shift+click on the bottom point to select it as well.
00:03:28 And then, I will drag upward on this lower widget
00:03:32 as far as I can until I go way past
00:03:35 the top edge as you're seeing here.
00:03:37 Notice the other widget moved way below the bottom edge.
00:03:41 And I end up with this maximum
00:03:42 corners value of 243.78 points.
00:03:46 And that's going to vary depending on the size of the shape.
00:03:48 But if you're doing exactly what I'm doing,
00:03:50 you'll get that result as well.
00:03:52 And we end up with this kind of modified ellipse.
00:03:55 You may wonder why would you do that?
00:03:57 Why would you ever go through the steps
00:03:59 when you have the ellipse tool,
00:04:01 which gives you better looking results?
00:04:03 And the reason is we can customize our experience
00:04:06 using round corners.
00:04:09 Alright, now I'll alt+click or opt+click
00:04:10 on the outline of the shape
00:04:12 to select the entire thing.
00:04:14 And then I'll double click on any one of these
00:04:16 round corners widgets to revisit the Corners dialog box.
00:04:19 And now notice you can still switch your corner type
00:04:22 to, for example, inverted round
00:04:24 which produces this interesting effect.
00:04:27 And if you switch to Chamfer,
00:04:28 you're going to restore a rectangle.
00:04:30 So again, you can customize
00:04:31 this experience as much as you want.
00:04:33 I'm going to switch back to round,
00:04:35 and now I'm going to switch from absolute,
00:04:37 which is trying to draw those perfect arcs, to relative.
00:04:41 And if you look closely, I'll do that again.
00:04:43 This is the appearance of absolute rounding.
00:04:46 And this is the appearance of relative rounding.
00:04:49 And notice when I switch to relative,
00:04:50 the acute corners become sharper,
00:04:53 they become bigger lumps,
00:04:54 and the less acute corners, these big corners
00:04:57 right here, they flatten out.
00:04:59 And as a result, we get a smoother shape.
00:05:01 At which point I'll click OK in order to accept that change.
00:05:06 Alright now, just for the sake
00:05:07 of getting something done here,
00:05:08 let's turn this shape into an eye
00:05:10 by pressing control+c or command+c on a Mac,
00:05:13 in order to copy the shape to the clipboard.
00:05:16 Now I'll go ahead and shift+click
00:05:17 inside the custom starburst to select it as well.
00:05:20 And then I'll go up to the Object menu,
00:05:22 choose Compound Path and choose Make.
00:05:25 And that moves the shape in front of the text.
00:05:27 So I'll right click somewhere inside the document window,
00:05:29 choose Arrange, and choose Send to Back,
00:05:32 in order to send that shape in back of the text.
00:05:35 And then to paste that shape
00:05:37 that I just copied into the background,
00:05:39 you want to go up to the Edit menu,
00:05:40 and choose Paste in Back,
00:05:42 or you have that keyboard short cut
00:05:44 of Control+b or Command+b on a Mac.
00:05:46 And it looks like we just filled in the path,
00:05:48 but that's because it's filled with the same color
00:05:50 as the starburst, which will become evident
00:05:52 as soon as we rotate it
00:05:54 by clicking on the word Transform
00:05:55 over here on the right side of the Control panel.
00:05:57 Make sure that center reference point
00:05:59 is once again selected,
00:06:00 and change the rotate value to 90 degrees.
00:06:03 And then press the Enter key,
00:06:05 or the Return key on a Mac, to apply that change.
00:06:07 Alright now I think the iris should be purple.
00:06:10 So I'm going to click on the first color swatch
00:06:12 and I'm going to change it to this
00:06:13 shade of purple right there,
00:06:14 the one that begins with R=147.
00:06:17 Alright now I'm going to create the pupil
00:06:19 by clicking on the word Transform once again.
00:06:21 And this time I want the link to be on,
00:06:23 so I'm going to go ahead and click on this chain icon,
00:06:25 so that the width and height values are linked together,
00:06:27 and now I'll click on the width value and change it to 70%,
00:06:32 so you want to enter the percent value.
00:06:34 And then, because I want to make a copy of this shape,
00:06:36 I'll press alt+enter, or option+return on a Mac.
00:06:40 Alright now, we want this shape to be black,
00:06:42 so I'll go ahead and click on the first color swatch
00:06:44 and change it to black like so.
00:06:46 Alright now we need to create a little highlight.
00:06:48 So I'll click on the word Transform once again.
00:06:50 Click on the W in order to select the width value.
00:06:52 Change it to 33% and then press alt+enter,
00:06:56 or option+return on a Mac,
00:06:58 to create a smaller copy of that shape.
00:07:01 Let's change it's fill to white.
00:07:03 And then I'm going to press shift+ up arrow
00:07:05 three times and shift+left arrow once
00:07:07 in order to move the highlight
00:07:09 into the position you see it now.
00:07:11 And now I'll go ahead and click off
00:07:13 the shape to de-select it.
00:07:14 And I'll turn off the guides layer
00:07:16 so we can take in the final version
00:07:18 of this awkward art.
00:07:20 And that is how you switch between
00:07:21 absolute and relative rounding
00:07:23 here inside Illustrator.
